
Cyber_Lab01: Building a Pac-Man Adjacent game on your local machine using Docker and Kubernetes (Beginner Friendly)
No prior tech knowledge is needed complete this lab, that's how easy it is.


My first lab guide is here! I’m so excited.
I know this content won’t be for everyone who follows along here, but for those of you interested in lab building, learning about containerization, and understanding cloud tools, or simply trying to determine whether or not technical tools are something you’re interested in learning how to use, this post is definitely for you.
This guide is intended to do a LOT of hand-holding, as it’s my first lab guide and intended to be my easiest, but all of my guides won’t be this way. They’ll all be labeled and sorted by technical aptitude, giving you the ability to determine what kind of challenge you’re up for.
This lab is perfect for anyone who has never touched a terminal setting and has absolutely no idea where to begin, because I was there once and had no idea what to do, and wished I had a few easy labs to mess with.
This lab is intended to prove that anyone can learn how to use cyber-tools regardless of their experience level.
By the end of this lab, you’ll have an instance of Pac-Man running in a container inside a local Kubernetes cluster. Don’t worry, I’ll explain before we get into this.
Note: if you’re not interested in or don’t need background information, you can scroll til you see the Pac-Man gif to get started with the build. :-)
My goals are:
To give you our basic plan of action
To break down the tools we are using and why
To teach you how these tools work in conjunction
And to empower you to feel comfortable using basic technical skills to accomplish something fun, even if this is something you’ve never done before
Skills you’ll practice:
Docker basics
Kubernetes basics
Using a GitHub repository
Running basic commands in PowerShell
Background skills you’ll need:
Comfort troubleshooting, getting frustrated, and making mistakes. That’s it.
Our Basic Plan:
We’ll be downloading an instance of Docker Desktop, enabling Kubernetes, accessing my personal GitHub repository to download the necessary components for the game, and working at the command line to access all of this on our personal machines.
Breaking down the tools we’re using and why:
Here’s the information you need in hard mode and easy mode, depending on your learning type.
Hard Mode (technical jargon version):
Docker Desktop:
What it is: Docker is a tool that packages apps (here it’s Pac-Man) and everything they need into a portable box called a container.
Why we use it: We need a box that holds our Pac-Man game so it runs the same way on any computer. Docker is that box.
Kubernetes:
What it is: Kubernetes is a system that manages a lot of Docker containers for you. Essentially, it works as our Docker Babysitter. It makes sure our containers are running, replaces them if they fail, and helps us access them.
Why we use it: We don’t want to run Pac-Man manually in Docker each time. We could do that every time we want to run the application, but instead, we’re offloading that work to Kubernetes to manage it for us.
Easy Mode (analogy version):
Docker Desktop
What it is: Docker is like packing Pac-Man and all his toys, snacks, and clothes into a suitcase. No matter whose house you bring it to, Pac-Man has everything he needs.
Why we use it: The suitcase makes sure Pac-Man is the same everywhere—no forgotten toothbrushes.
Kubernetes
What it is: Kubernetes is the babysitter. Instead of you having to sit and watch Pac-Man all the time, the babysitter keeps an eye on him. If he falls over (a container crashes), the babysitter helps him back up. If more friends come over, the babysitter makes sure everyone has snacks and space to play.
Why we use it: We don’t want to babysit Pac-Man ourselves every single time. Kubernetes does that work for us.
How these tools work in conjunction
So, altogether…
Docker: packs Pac-Man into a suitcase so he’s portable.
Kubernetes: babysits Pac-Man, makes sure he runs, restarts him if he crashes, and handles extra players.
Without Docker, you can’t easily bring Pac-Man to the babysitter’s house.
Without Kubernetes, you’d have to watch Pac-Man yourself.
Make sense? I hope so.
It can be a lot, so feel free to go over this information again, or to look up information using external resources to answer any questions you might have.
Let’s get started with our build…

**For this lab, I’ll be using a Windows 10 Machine (I know, I know, end of support date is upon us, just 8 days shy of my 33rd birthday in case you were curious). You can still follow the basic format for this lab on a Mac or Unix machine with some substitutions in your respective terminal of choice.**
Step 1: Downloading Docker Desktop
Here’s the current download link for Docker Desktop - you know, to house Pac-Man.
Follow the information for download using the reputable site I provided, making sure you DO NOT download something from a third-party site masquerading as the original if you choose to follow links of your own.
Once you have Docker Desktop installed and downloaded using the baseline recommended settings, you can move on to the next step.
Step 2: Docker Desktop Settings
Once you’ve installed Docker Desktop using the recommended settings, the application will ask you a few questions.
The first thing it’s going to want to know is if your use for Docker Desktop will be personal or professional. Choose personal, it’s free, and make an account using your email address.
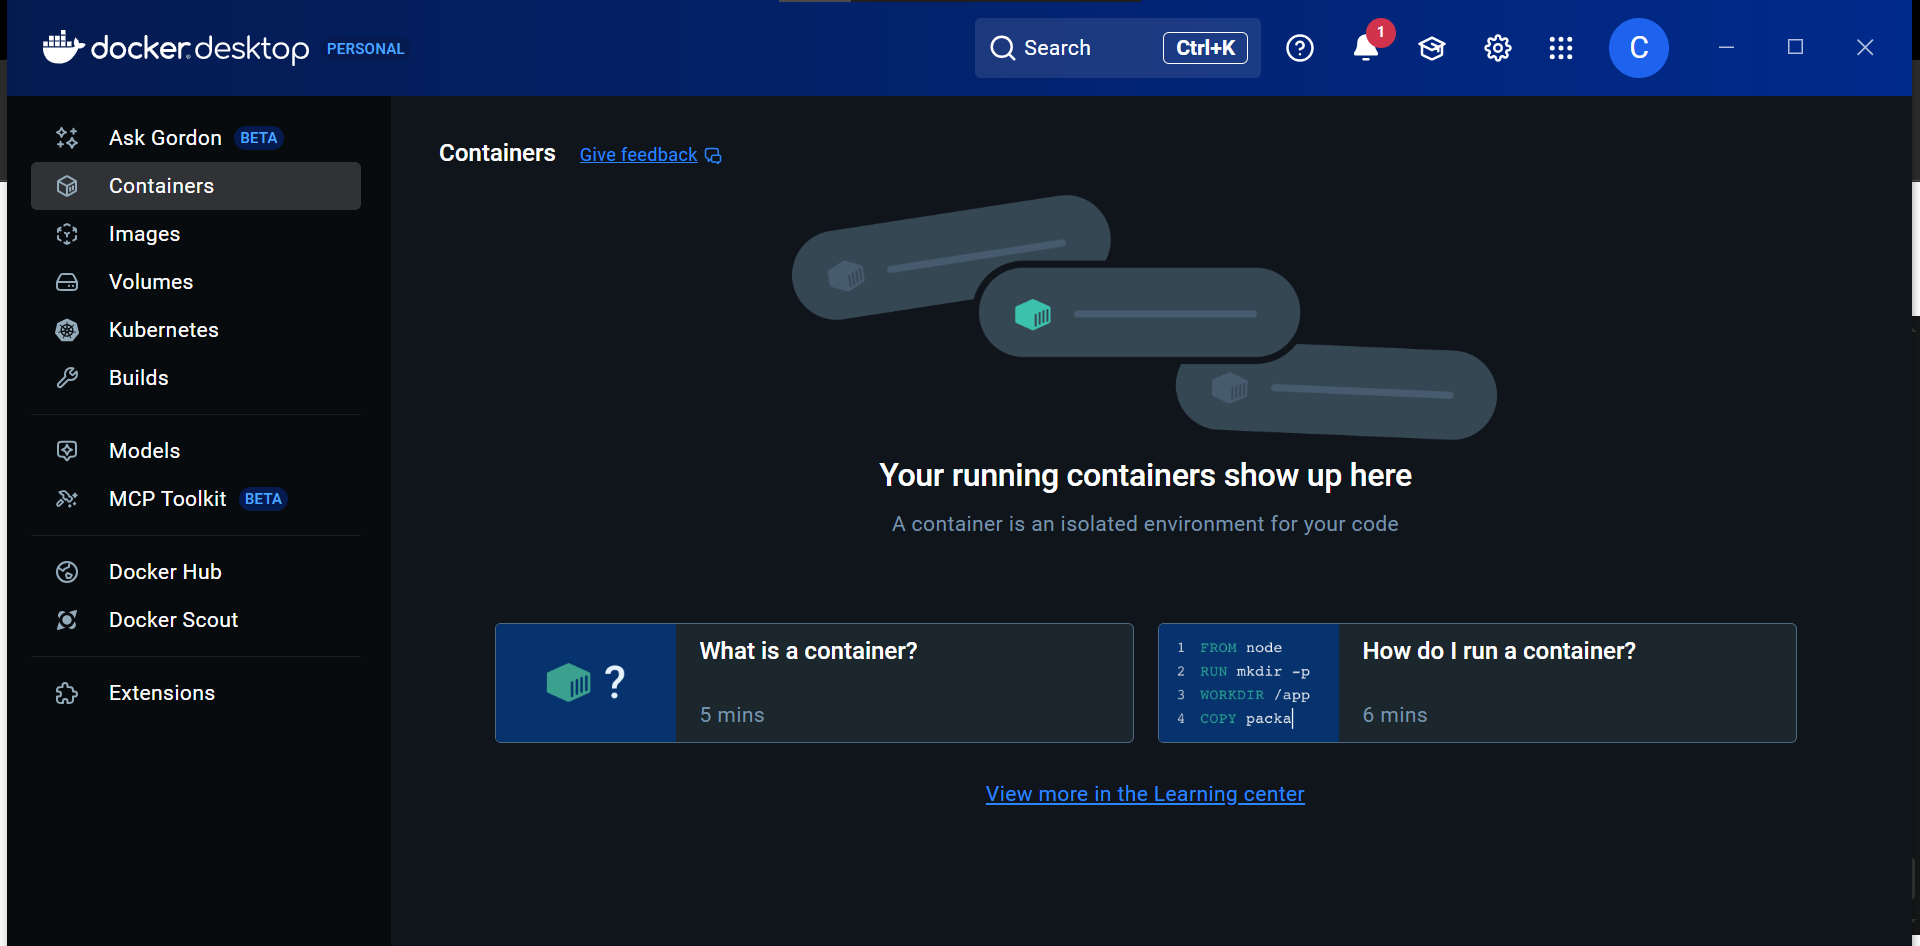
Once you’re logged in, Docker has some tutorials on the application homepage that you can check out, and apparently, an AI named Gordon, which is fascinating to me. Depending on when you’re accessing this tutorial, your homepage might look a little bit like this…
And, because I couldn’t stop myself, I asked Gordon a question. He was very nice but not that helpful.
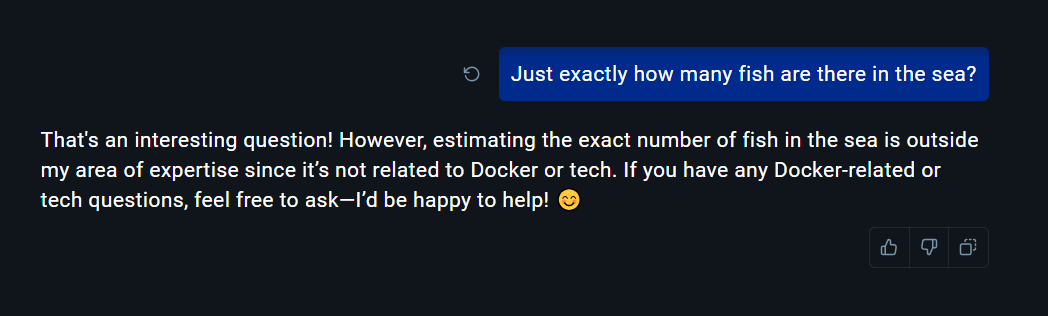
According to Google, the answer is about 3.5 trillion, but that’s a guess because most of the ocean floor remains unexplored. Anyways…
Once in Docker, we need to enable Kubernetes. Let’s ask Gordon how to do it.

Ok, pretty cool. So, I’ll follow these steps and make sure I have Kubernetes enabled. After that, I’ll verify that it’s running by executing the command he listed in my PowerShell terminal.
But first, we need to download kubectl, so we’ll run that command later in Step 4.
Step 3: Installing kubectl (Kubernetes CLI)
We need kubectl in this lab, because it’s the command-line tool that lets us interact with Kubernetes clusters (like the one we just created in our app). Even if you’re using Docker or other tools, Kubernetes itself requires a way to manage and communicate with its resources (like pods, deployments, and services), and that’s exactly what kubectl does.
Think of it like this: if your Kubernetes cluster is a house, kubectl is the remote control that lets you turn lights on/off, check the fridge, or open doors. Without it, you can’t tell the cluster what to do.
Using my already open PowerShell terminal, I’ll input the following commands to download kubectl and hit enter:
winget install -e --id Kubernetes.kubectl
kubectl version --client

Type in a Y and hit enter, and the download process will begin. Once completed, you should see a successfully installed message appear in your PowerShell terminal.
If you find that ‘winget’ is not installed on your machine, a quick Google search should tell you what you need to do.
Step 4: Verify Docker & Kubernetes are running
After the download has completed, enter the following commands into your PowerShell terminal and hit enter. This verifies for us that Docker was successfully downloaded, and gives us a bit of information, which I’ll explain below. You can enter this into your PowerShell terminal all at once.docker version
kubectl config current-context
kubectl cluster-info
kubectl get nodes
Here’s what those commands do:
docker versionshows details about Docker, including version numbers and build info.kubectl config current-contexttells you which Kubernetes cluster yourkubectlis currently pointing at.kubectl cluster-infodisplays information about the Kubernetes master (API server) and key services running in your cluster.kubectl get nodeslists all the nodes in your cluster along with their status, roles, and resource information.
You don’t need to understand all of this information to continue with the lab guide; this information is just interesting and a good practice to observe. If we receive an error message back, we know Docker and Kubernetes might have some issues we need to troubleshoot before moving on.
Intermission: At this point, the powers that be (Substack) are letting me know I am near my email length limit. If you’re reading this through an email subscription, you’ll need to continue reading this post using your browser. This doesn’t require an app download, even if your phone tells you it does. Idk when it will cut me off, so I’m going to just keep going.

Here is one of my favorite cat pics. If you click it, it will take you to the browser version of this post.
Step 5: Installing Git on Windows
Why do we need Git? And What is GitHub?
Git is a version control system that tracks changes to files over time from the command line.
For this lab, it lets you download files and projects from the internet onto your personal machine from the command line, so you don’t have to get on the GitHub website and fiddle around in there. Git does the heavy lifting for you.
In this Pac-Man Adjacent Lab, we’re using Git to download the prepared files from my GitHub account onto your computer.
If you’ve never used GitHub before, think of it as a huge library where developers all over the world can create, store, and share their projects. It lets you not only download and run those projects on your own machine, but also track changes, collaborate with others, and even contribute back to the code.
It’s a cool spot, but it can look super intimidating at first. It’s super busy, and there are tons of YAMLs and HTMLs and READMEs, and it’s practically impossible to know what to look at first when you’re just starting out, but the more you immerse yourself in it, the easier it becomes, I promise.
You don’t technically need a GitHub account to download and run my Pac-Man adjacent lab. But if you’re interested in all things cyber, it’s a good idea to go ahead and make one. Be sure to use a funny/cool/strange name for yours, like I did for mine.
How to install and download Git on a Windows machine:
From your browser, go to the official Git website here.

Instructions should look something like this. It’s always best practice to download the latest maintained build because you get the most up-to-date features, security patches, and bug fixes. Older builds may still work, but they can leave you open to vulnerabilities or compatibility issues.
The download should start automatically. If not, click the link for the 64-bit installer (you can run a quick Google search to make sure the 64-bit type is compatible with your machine, but it most likely is).
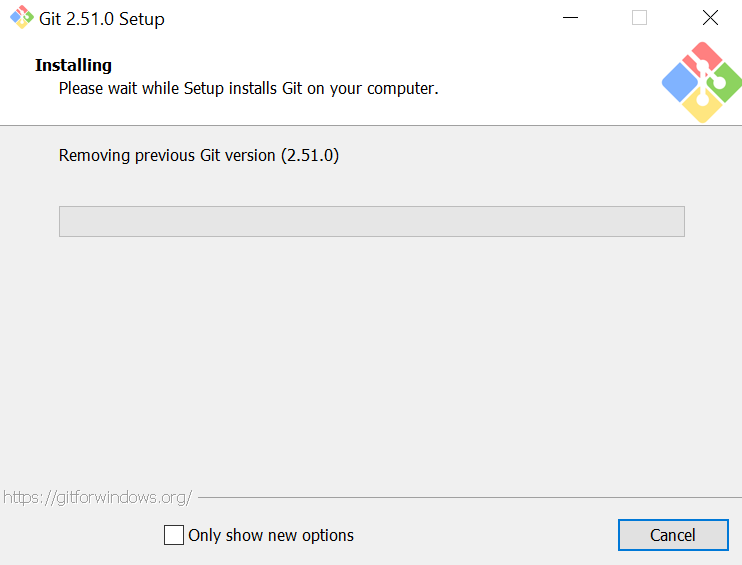
Depending on when you’re accessing this tutorial, the setup will look similar to this…
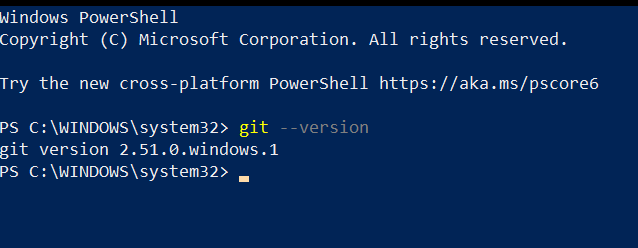
At the end of setup, it will ask you if you want it to launch Git Bash, but you don’t need to do that. Just open up a NEW PowerShell terminal (to reflect the new tool installs) by right-clicking and using ‘Run As Administrator’ mode, and enter the command:
git --version
This command lets you know that your download was successful!
Step 6: Downloading the Lab Files from my GitHub Repository
Before we do that, let me explain where a lot of beginners (myself included) get stuck…
Choosing what folder to put your downloads into.
For the rest of this lab, we will need to access our terminal from the proper directory, or our computer won’t know what to do moving forward.
What does this mean?
A directory is just another word for a folder on your computer. Every time you type commands in PowerShell, your computer needs to know which folder (directory) you’re currently “inside,” because that’s where it looks for the files you’re asking it to use. If you’re in the wrong directory, your computer won’t find the files. It’s annoying, but it’s kind of like asking someone to grab a book from a shelf when you’re standing in the wrong room.
When I was just starting out, I liked to create my directories (files) on my desktop, so it was harder for me to lose them. Hehe.
So… if you’re still at System32 like I am (this is where PowerShell opens up by default)… we want to navigate to the proper directory before downloading the GitHub repository. This tells our computer that the new files live here, and when we want to use them, our computer will understand what we’re asking it to do because we’re in the right room in our house.
System32 is an important part of our computer, so we don’t want to download Pac-Man there. It’s a critical system folder that Windows uses to run your operating system. So, we need to use some commands to change directories from System32. Your computer might be a bit different from mine, so I can’t give you an exact command to run, but I’ll set you up with the basics.
First, run the command pwd. This tells your computer to print the working directory and tell you where you’re currently located.
From there, you’ll use the cd command. This is the change directory command. Then you’ll give the path to the directory ‘Desktop’. Replace the command below with your machine’s actual credentials.
cd C:\Users\YourUserName\Desktop
For example, here’s mine.

Now that we’re in the right directory, we’re almost done!
This next part is super easy. It’s time to run some commands using our Git tool to download the repository (my Pac-Man files related to this project) onto your personal machine.
Here are the PowerShell commands you’ll need:
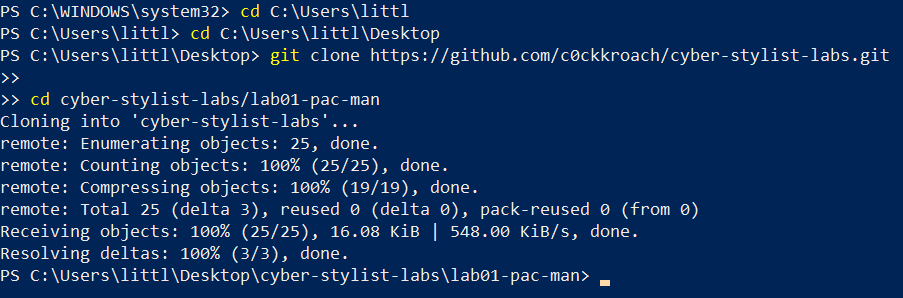
git clone https://github.com/c0ckkroach/cyber-stylist-labs.git
cd cyber-stylist-labs/lab01-pac-man
Successful download will look something like this…
Step 7: Running Your Pac-Man Adjacent Game!
YAY! Ok…
From where you currently are in your PowerShell terminal, run the following commands to deploy Pac-Man to Kubernetes.
kubectl apply -f pacman.yaml
This tells Kubernetes to create both the Pac-Man pod and the Service described in the single YAML file.
And then…
kubectl port-forward svc/pacman 8080:80
This command connects your local computer to the Pac-Man app running in Kubernetes so you can play it in your browser!
Now, all you should need to do is head over to your browser to…
http://localhost:8080/
This tells your browser to use port 8080 on your own computer to access Pac-Man. How crazy is that? You are playing a full Pac-Man game that’s running inside a Kubernetes cluster on your own machine.
It’s wild when you think about it: your local browser is talking to containers managed by Kubernetes, all orchestrated seamlessly, and you didn’t have to install the game locally. You just built, deployed, and connected to it using real DevOps tools, all in one workflow.
Step 8: Shutting it down.
Done playing? Here’s how to easily shut it down.
From your PowerShell terminal, where you used to run the Pac-Man game, type Ctrl + C. This will end the game running in your browser.
If you don’t want to use the Pac-Man game again, you can run the command:
kubectl delete -f pacman.yaml
This tells Kubernetes to remove the Pac-Man pod and service.
Last, if you don’t need Docker or Kubernetes running for other projects, you can quit Docker Desktop by clicking the whale icon in the taskbar and clicking ‘Quit Docker Desktop’. This stops the local Kubernetes cluster and frees up system resources.
Step 9: You did it!
You did it!!
If you followed this tutorial, please leave me a comment below. It’ll make me so happy. Feel free to shoot me an email at leahmichellekaplan@gmail.com and let me know how it went, if you have any questions, or if there are any errors/issues found within this tutorial that need to be corrected.
Special shout-out to GitHub user onnayokheng for the index.html file used for this project.
My next lab will be the creation of a virtual pet shop a la Littlest Pet Shop using Terraform. Are you ready?
If you liked this, please subscribe! It helps a bunch.
Xx
L
Wow- this is impressive!
Wow! I wish I had such tutorials in uni!